![]() As I said in my post earlier I have upgraded to Kubuntu 10.10 from 9.10. One of the first thing I needed to do was to add my second disk. The laptop I have has 2 500 GB disk and the second one was not installed/used during the install. So I need to add that one.
As I said in my post earlier I have upgraded to Kubuntu 10.10 from 9.10. One of the first thing I needed to do was to add my second disk. The laptop I have has 2 500 GB disk and the second one was not installed/used during the install. So I need to add that one.
There are 2 ways of doing this. You can install and run the gparted graphical program, or you can use the command line.
First thing to do is locating you new disk. if you dont know what name it has you can run the command:
|
1 |
sudo lshw -C disk |
This will produce a list of disk in you system and show the names:
|
1 2 3 4 5 6 7 8 9 10 11 |
*-disk:1 description: ATA Disk product: ST9500420AS vendor: Seagate physical id: 0.0.0 bus info: scsi@4:0.0.0 logical name: /dev/sdb version: 0006 serial: 5VJ5CHWC size: 465GiB (500GB) capabilities: partitioned partitioned:dos configuration: ansiversion=5 signature=1eafd418 |
The Logical name is what you need for the following parts.
Gparted
if you want to do the work you can use gparted. If you havent installed this you probably need to install it with:
|
1 |
sudo apt-get install gparted |
This will install it and some libraries with it.
There is some things to mentione with this. If you start it from the menu system (application->settings->gparted) it will ask for a password, and it is the root password. By default kubuntu system will not set a usable root password and you will not be able to use it. You can run it from the command line (sudo gparted) or you can set a password for root.
|
1 |
sudo passwd root |
But remember – do not ever login as root. just use sudo.
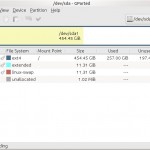
When you then start up gparted you will see:
In the top-right corner of the window, choose your new hard drive from the drop-down list, referring back to the “logical name” from earlier. The window should refresh and show you a representation of the new drive.
if you – like me – have a dos file system on you you probably want to remove it first, by clicking on the bad representing the dos file system, and select delete.
Then you can start and create the new filesystem:
- Right-click on the white bar and choose “New.”
- For “New Size” the number should be the maximum allowable, to fill the entire disk.
- Choose “Primary Partition”
- Now select a filesystem. Use “ext4” for kubuntu.
- Now click Add to compute the partition. The graphical display should update to show a new partition covering the entire disk.
- To finish, click “Apply,” or Edit > Apply. The disk will then be partitioned and formatted.
You may now close gparted.
Making filesystem from command line.
First use fdisk to delete the old filesystem and create a new partition:
|
1 2 3 4 5 6 7 8 9 10 11 12 13 14 15 16 17 18 19 20 |
sudo fdisk /dev/sdb ... Command (m for help): d Selected partition 1 Command (m for help): n Command action e extended p primary partition (1-4) p Partition number (1-4): 1 First cylinder (1-60801, default 1): Using default value 1 Last cylinder, +cylinders or +size{K,M,G} (1-60801, default 60801): Using default value 60801 Command (m for help): w The partition table has been altered! Calling ioctl() to re-read partition table. Syncing disks. |
Now the partition is created. You now need to use the mkfs command to create the filesystem:
|
1 |
sudo mkfs.ext4 -L /CD/ /dev/sdb1 |
The /CD/ is where you want to mount the drive
Mount the filesystem
Now we need to make a mountpoint and edit fstab so that the system will mount the drive automatically on boot.
First create the dirctory:
|
1 |
sudo mkdir /CD |
The set the ownership to plugdev group, those who are meant to be able to mount removable disks, desktop users.
|
1 2 3 |
sudo chgrp plugdev /media/mynewdrive sudo chmod g+w /media/mynewdrive sudo chmod +t /media/mynewdrive |
Now we need to edit the /etc/fstab file
Fire up your favourite editor:
|
1 |
sudo vi /etc/fstab |
And add a line:
|
1 |
/dev/sdb1 /CD auto defaults 0 2 |
and then save it.
You can now test it by using the mount command:
|
1 |
sudo mount -a |
And the new drive should be mounted.

Wonderful web-site man , just simply maintain it .